Automatic irrigations systems are easy to install and the perfect project for a DIYer.
A home irrigation system will ensure your landscape and gardens receives the right amount of water on a consistent schedule; keeping it healthy and water wastage down.
In this step-by-step guide we will walk you through everything you need to know to learn how to install an irrigation system including the equipment you will need and planning tips.
So, where do we start?
What Items Are You Going to Need?
Different types of irrigation systems will require different tools and equipment. It is essential that you complete a comprehensive plan of your landscape to determine the correct fittings, pipes etc required.
As a general guide, some of the tools, fittings and pipe equipment you need for your DIY irrigation system may include:
Tools
-
Trenching Shovel
-
Long handle shovel
-
Multi-grip pliers
-
Tape measure
-
Marking paint
-
Marker flags
-
Punch tool (if using dripline)
Materials
-
Brass gate valve + dual check valve (mains connection)
-
Irrigation solenoid valves
-
Low voltage solenoid wire- 0.5mm guage
-
PVC fittings- Couplings/ Elbows/ Tees etc
-
Poly fittings- risers, nipples, barbed fittings, ratchet clamps etc
-
Plumbers thread seal tape
Steps on to install an Automatic Watering System
The crucial first step:
Plan your garden layout!
Whether it's lawn irrigation or home garden irrigation for flower beds, planning is critical.
Proper planning is essential to ensure you purchase the right equipment and cater for your garden needs. This is your best bet to creating an effective watering system that keeps your plants healthy. Consider where your target areas are, and the unique watering needs of different plants.
Now, designing an irrigation system isn't rocket science but it also requires some specialist knowledge. Good news is there are many experienced industry experts available that will do this for you. Click here for a free design and quote online.
Next step is to identify how much water you have available. Calculating your water flow will help you determine the best irrigation systems for your space.
Once you have your plan and flow rate measurement, we get to the fun part: how to install an irrigation system.
Step 1. Installing a "Point of Connection"
Step 1. If you are installing your irrigation system connected to mains water source, you will need to have a plumber install a "Gate valve cut-in" in accordance with the local Water Authority regulations. This will comprise a brass gate valve and a dual check valve/non-return valve. If you are connecting to an existing bore you can ignore this step.
Ideally this step is done prior to calculating your flow rate as it is the first step to installing your system. If you want to start the process before gate valve installation, you can get an estimated figure from a garden tap.
For those looking at connecting to a garden tap, your connection point is ready to go. A garden tap will have reduced water pressure and water flow in comparison to a direct connection to the water meter however sometime this is the only option.
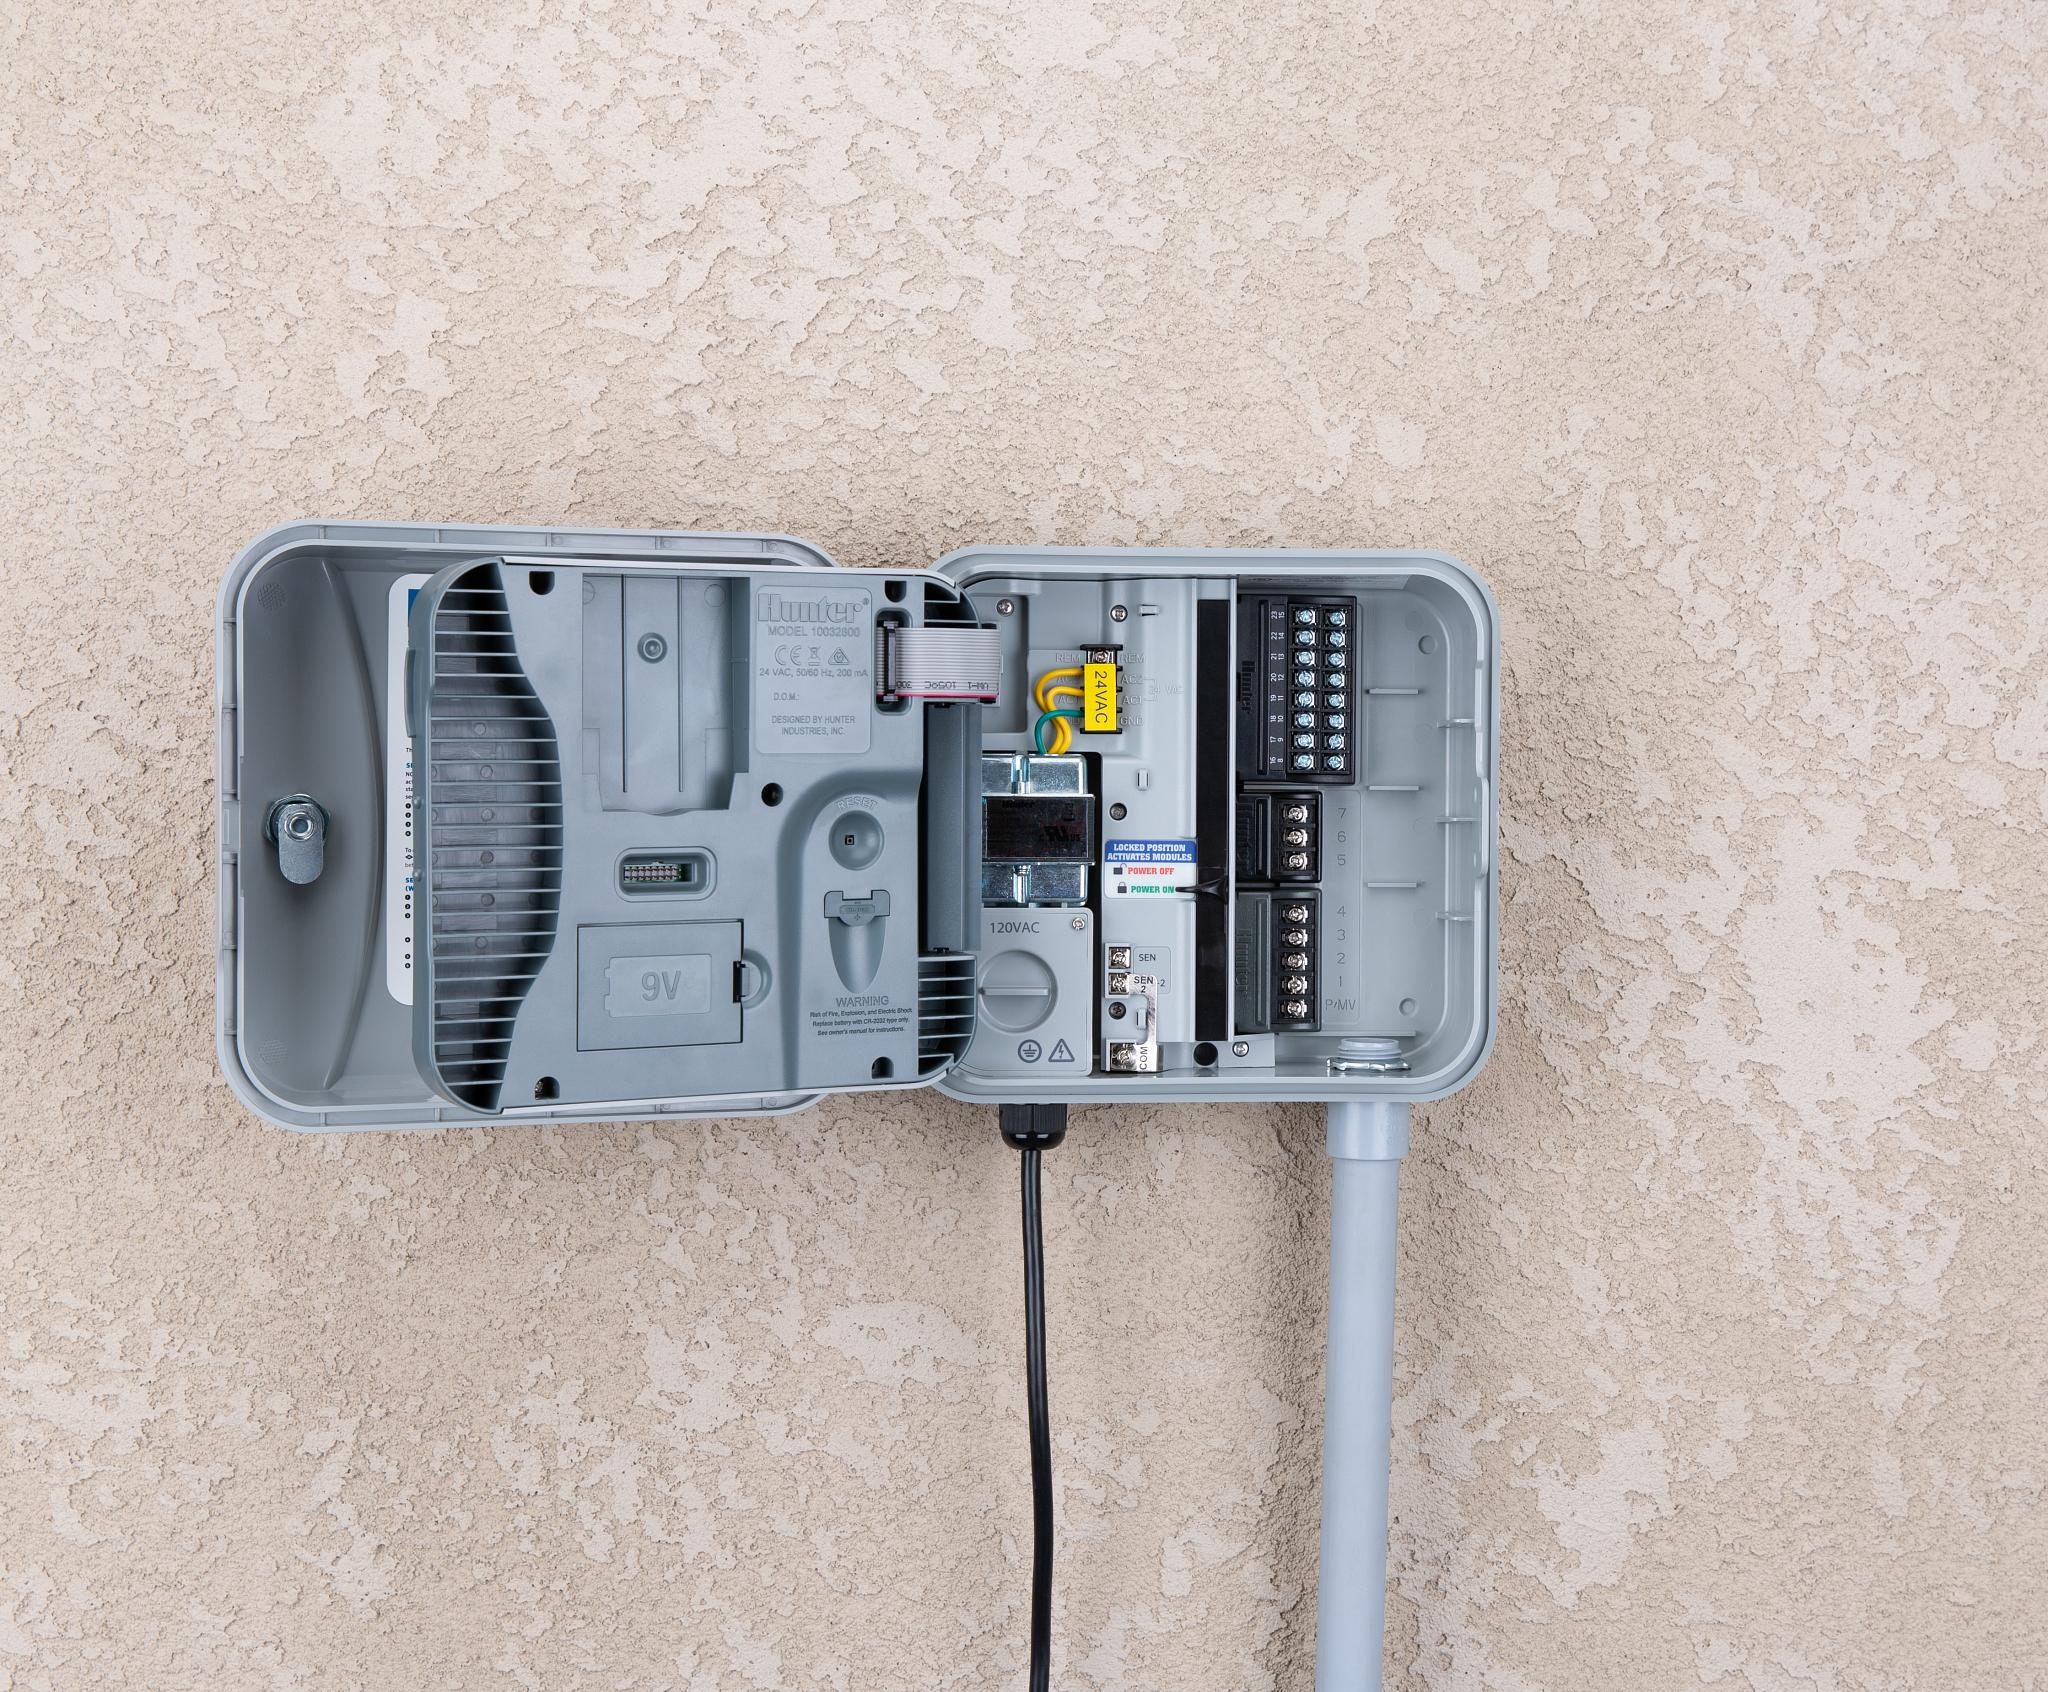
Step 2. Installing Your Automatic Irrigation Controller
Your irrigation controller will be chosen to suit your system requirements being 1) the number of stations 2) indoor or outdoor installation and 3) smart Wi-Fi enabled or not.
-
It is recommended that irrigation controllers are installed outside of the house in a location easily accessible. A common location is adjacent to the house power meter box as this enables simple access to power
-
Irrigation controllers are generally 24VAC and will require access to a general-purpose power outlet (GPO). If you have access to a GPO at the location of install, you will not require an electrician. If you don't, then you will need to engage a licensed Electrician to either install a GPO or hardwire to the house.
-
Irrigation Controllers are installed at eye level, so an electrical conduit (Grey medium density) will need to be installed out of the bottom of the controller, into the ground, terminating in a round green valve box known as a spotter box.
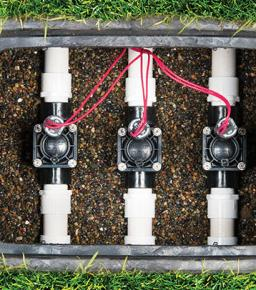
Step 3. Installing the Mainline & Station Valves
Your irrigation design will have the location of the solenoid valves marked on the drawing.
For mains water systems, the first valve will be installed directly to the "Gate-valve cut-in," as discussed at length in point 1. This valve is called the "Master Valve" and opens at every station in your system and prevents the pipe work between the point of connection and the solenoid valves from being under constant pressure.
Between the "Master Valve" and the individual station valves, you will install PVC pipe at the size shown on the drawing. This section of pipe is known as the "Mainline". Pipe should be installed below ground with a minimum of 200mm of sand cover. Pipe is joined using Priming Fluid and Solvent Cement.
Station valves are generally installed together fitting to a manifold and should be covered with a plastic valve box big enough to allow easy access.
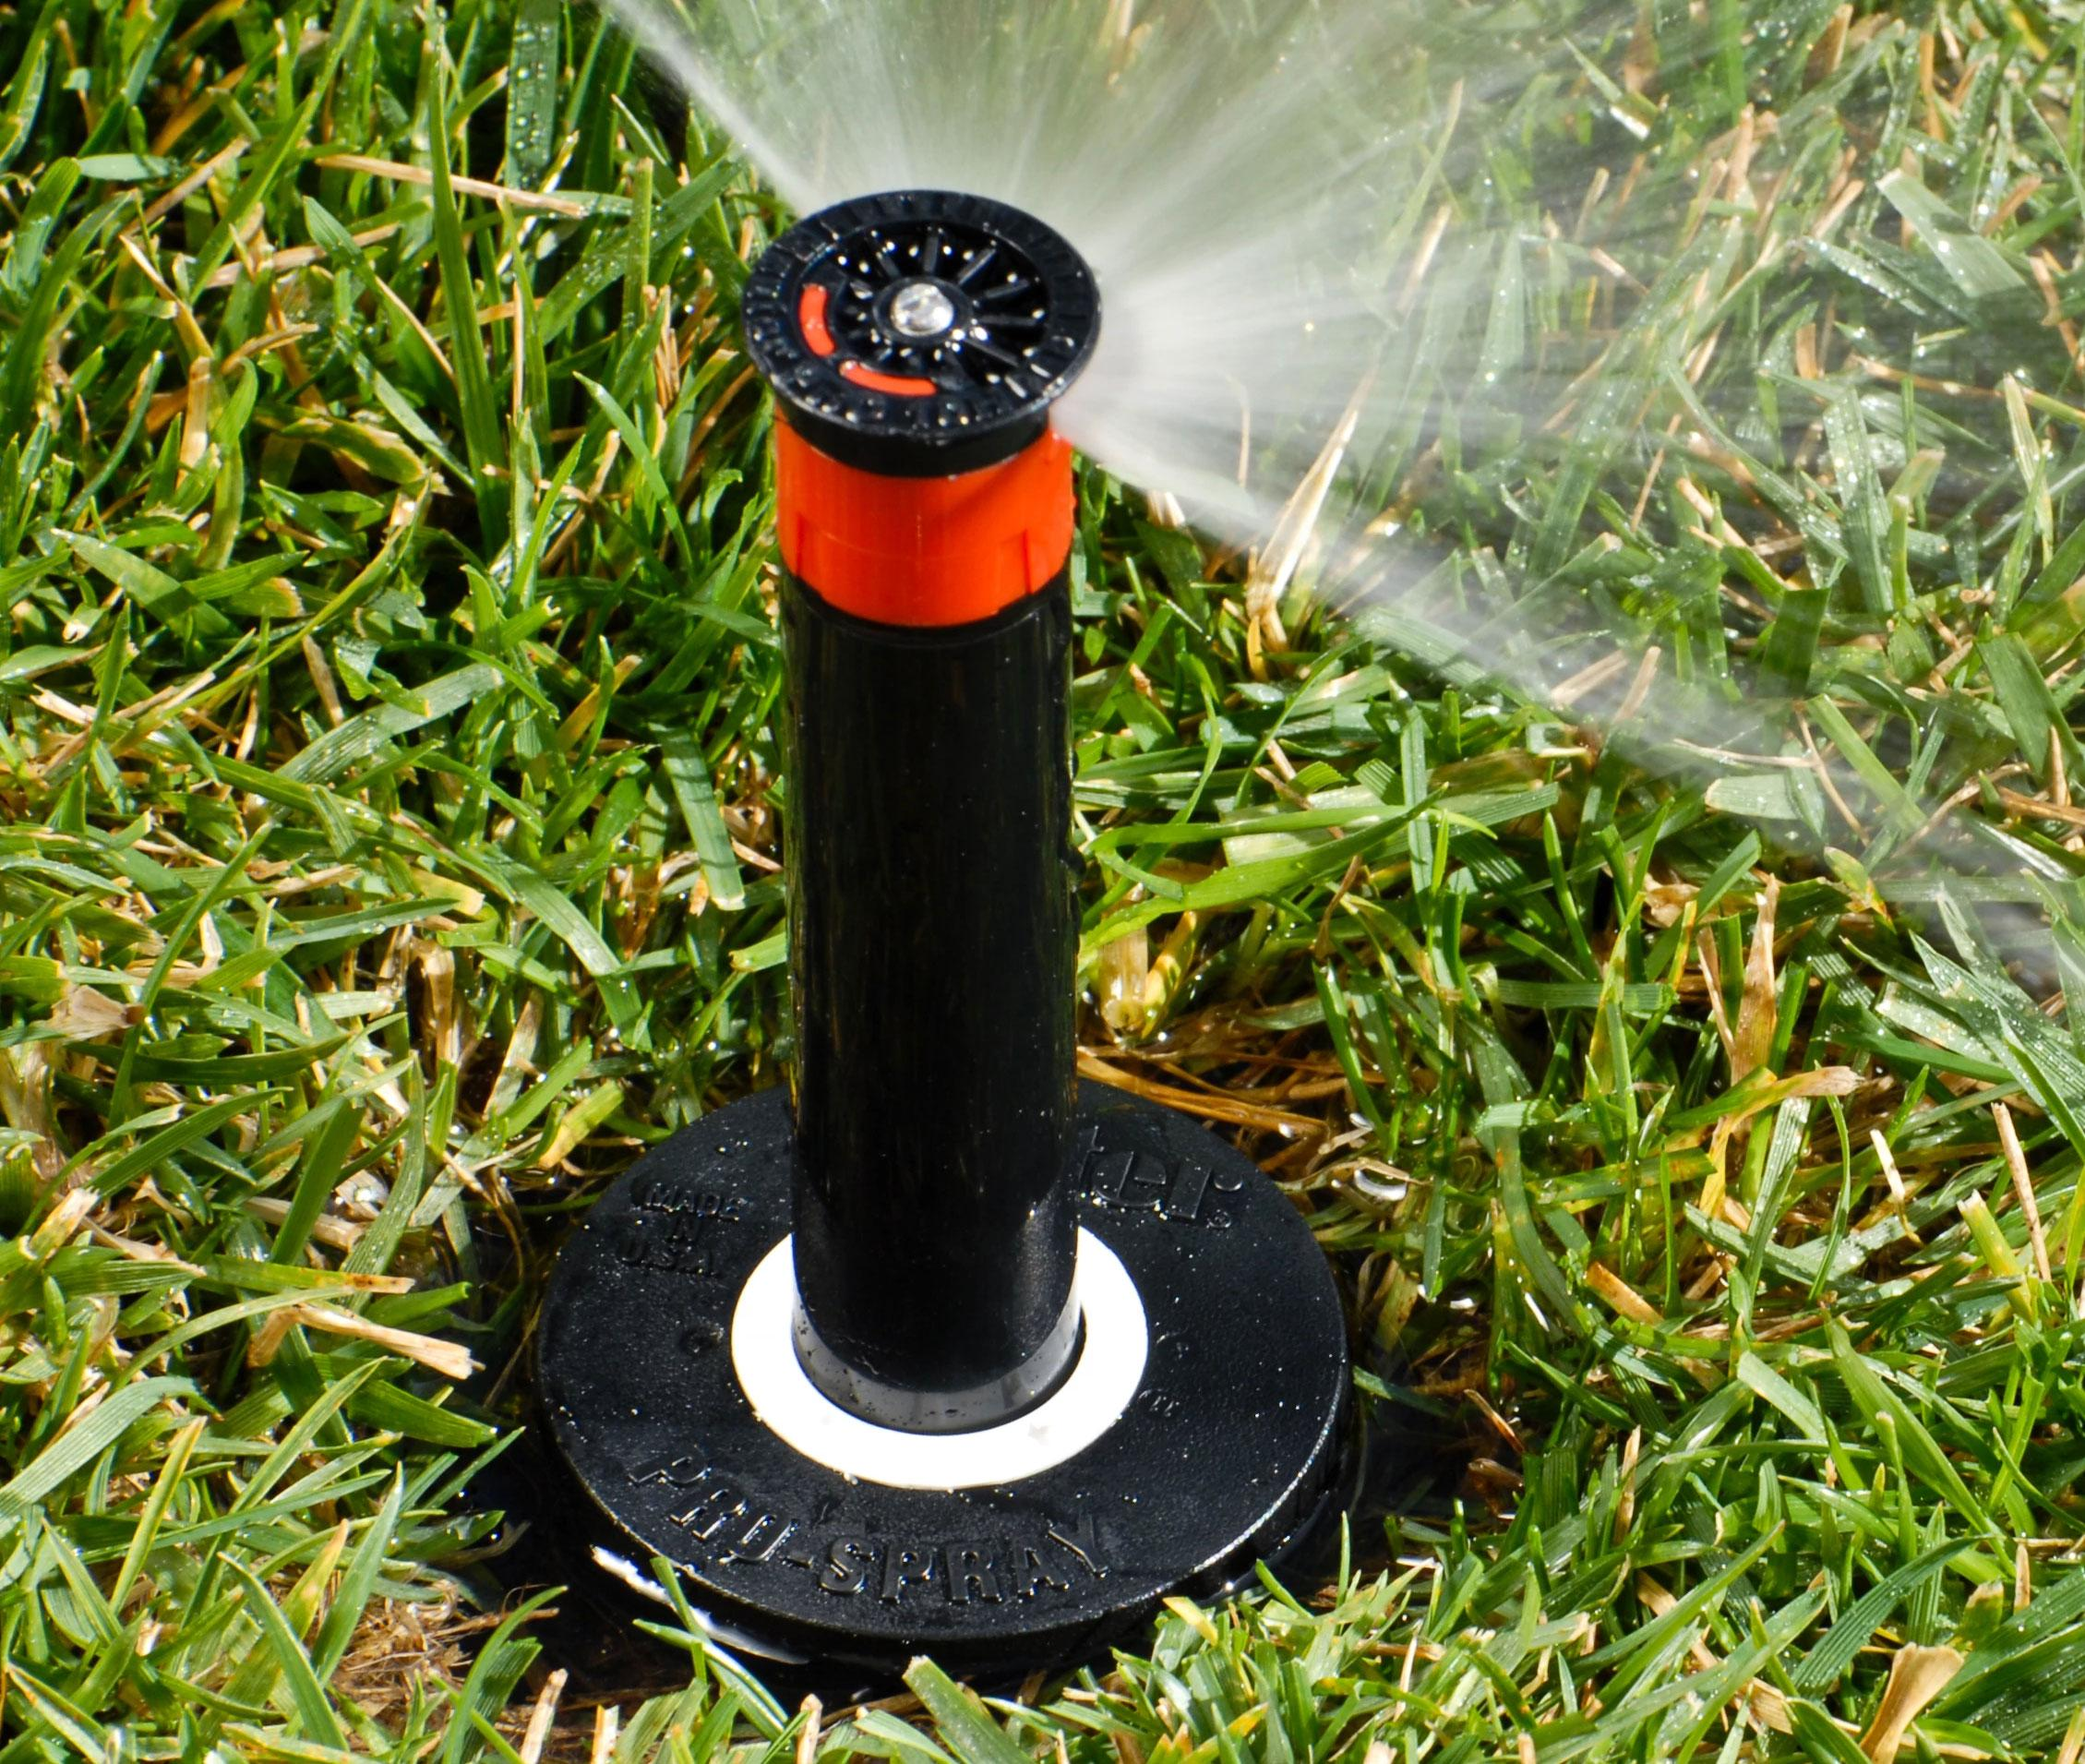
Step 4. Mark Sprinkler Locations
You're ready for the sprinklers once the mainline and valves are installed.
The first step is to take your sprinkler marker flags and stick them in the ground as per the design drawing. Pro-tip is to do all the 90d corners (Quarters) first then the 180d edges (Halves) followed by any 360d heads (Fulls). This step is important to take your time with and make sure the distance between the heads is close to the drawing as possible. Don't be afraid to make some alterations and fine tune the spacing. Often the final layout may differ slightly from the original design and you need to make sure no areas are being left short of coverage.
Step 5. Install Lateral Pipework & Sprinklers
The lateral pipework is the PVC or poly pipe between your station valves and the sprinklers. This pipework is pressurised when the station valve opens and provides water to all the sprinklers in which it connects to.
For lawn areas, this pipework is Class 9 PVC with solvent weld joints, the same as the mainline. Various fittings, tee joints, and faucet connections where the Sprinkler connects to the pipe will be used to enable 45—and 90-degree changes in direction.
Some garden bed stations will use a flexible low density poly pipe to connect to sprinklers/drip lines. This poly pipe if used is joined with barbed joiners and ratchet clamps. No glue required.
Your design drawing will outline the pipe route, so you only need to take your marker spray paint and spray lines in the dirt so you know exactly where to dig. Pro-tip: Save time and effort by combining multiple pipe runs in a single trench where possible. This will be shown as pipework running closely adjacent to each other on the drawing
Fitting the sprinklers should be incorporated into the lateral pipework install for efficiency. The best method is to pre-assemble the sprinklers and fittings so they can be quickly connected once the pipework reach the marker flag. An example is a pop-up lawn sprinkler will connect to the PVC pipe using a 15mm poly nipple and a PVC faucet elbow fitting so having this preassembled will enable you to simply glue it straight on once the pipe reached the sprinkler marker. Pro-tip: Install the sprinkler to the desired height and backfill sand around it tightly so it stays in place and holds the pipe down as you work your way though.
Step 6. Install Low Voltage Control Wire
The control wire is what's used to control your master and station valve from the controller. It is low voltage cable, so it does not need an electrician to install. However, taking your time and ensuring the connections are done well is important.
The cable itself will be specified based on the number of stations you have. One "Common" wire, black in colour, will connect to every valve, including the master valve. Then, there will be one single wire for every valve, including the master valve. These wires will all be different colours to identify the station at the controller.
The cable needs to start at the Master Valve position and run with mainline to the Station valves, then to the controller location, up the conduit dropout into the controller.
The wire connections must be made using waterproof wire connectors.

Step 7. Test Your Automatic Irrigation System
Once all components are in place, do a thorough system test to check for leaks, proper water distribution and functionality.
Turn on your water and check that everything is flowing correctly. Make sure your sprinkler heads are facing the right direction and that water is reaching each plant, and not over spraying onto non-target areas.
Once everything is operating smoothly, schedule your watering requirements on your controller unit (factor in individual plant and soil needs and zones).
Take advantage all the benefits of any features such as rain or moisture sensors for automated adjustments and water conservation.
Additional Tips
Once you have set up your irrigation system you should create an ongoing maintenance schedule. This will ensure that your system operates effectively and has longevity.
When conducting regular maintenance on your system and controller; you should check:
-
Valves, pipes and fittings for leaks, blockages and damage
-
Emitters and sprinklers - replacing any damaged components
-
Adjust your watering schedule seasonally to accommodate changing weather and plant growth patterns
Summary
By following this step-by-step guide, you can install an automatic irrigation system to enhance the health and sustainability of plants in your garden or landscape.
Thoughtful planning is key: this will ensure your landscape and garden gets the right amount of water in the right places, and that you get the correct equipment for your irrigation needs.
When installed correctly and regularly maintained, irrigation watering systems will last many years and minimise water wastage.
Need Help With Design?
Our knowledgable team are here to help! Simply calculate your flow rate using the bucket test method and our flow rate calculator. Measure your plot, and send through the information to us using this form.
One of our Home Irrigation Specialists will complete a free design and quote including professional grade irrigation equipment. Hard and soft copies of your irrigation design plan are sent to you upon purchase of the associated equipment as detailed in the plan.
Design only option is also available. Enquire to find out more.